The Photopia Blog
Tips, tutorials & inspiration for making slideshows
February 27, By Photopia
The Power of Shapes
The latest release of Photopia added dozens of new shapes! In today’s blog, we discuss four different ways you can use shapes to add interest to your slideshows.
Shapes can be applied to image layers, solids, and gradients. To view all the Shapes available in Photopia, select a layer in a slide (we’re using a solid white layer in our example).
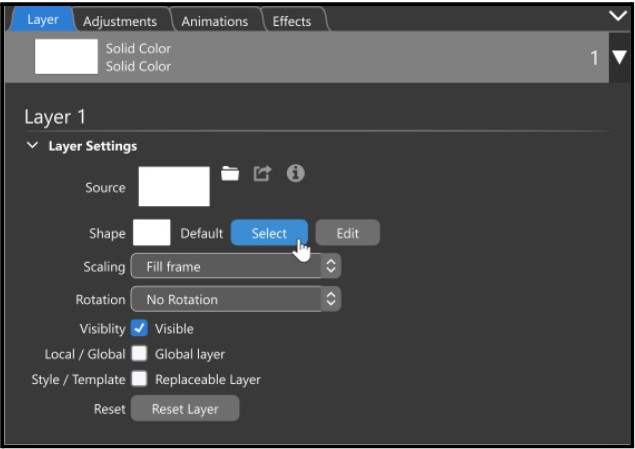
In the Options Panel, click on Select next to the Shape options.
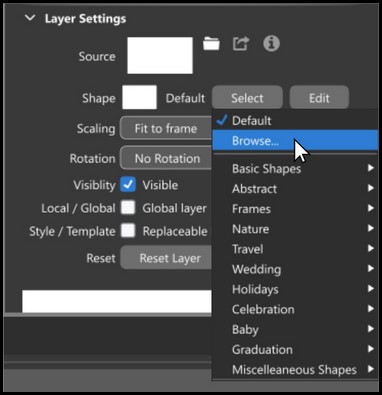
The fly-out menu displays categories with their corresponding shapes listed inside.
To see a visual representation of all of the shapes, click Browse.
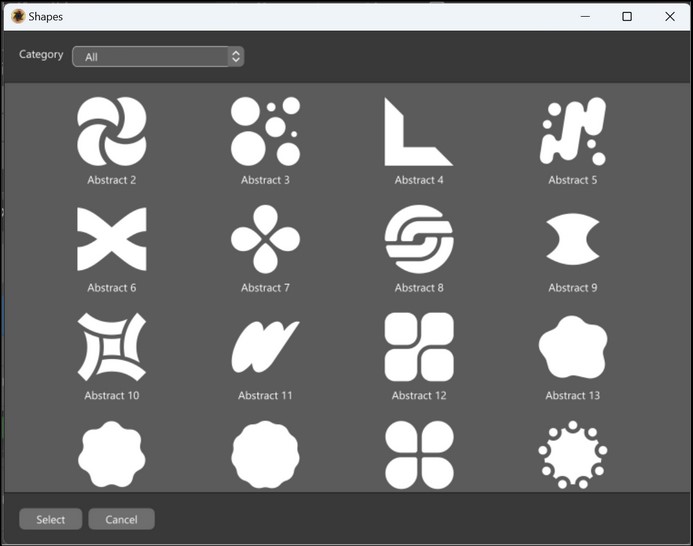
At the top of this window, there is a dropdown menu where you can view shapes all at once or by category. To apply a selected shape to your layer, click Select at the bottom of the window.
Now that you have a shape applied to a solid or gradient, what can you do with it?
Shapes Make Captions Pop!
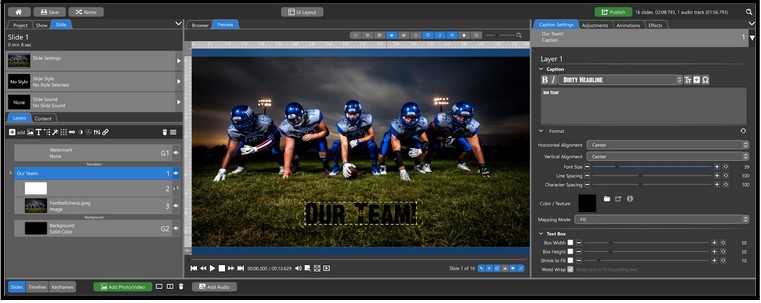
Adding a caption directly onto an image can be difficult to read, as seen above.
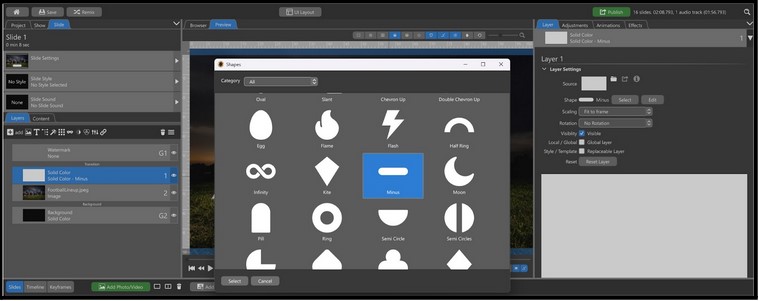
To make the caption easier to read, create a solid layer and apply a shape. There are several great shapes for this, including banners and abstract shapes. In our example, we used the Minus shape.

Resize and position the shape directly under the caption. You can even add an outline and a shadow to your shape layer!
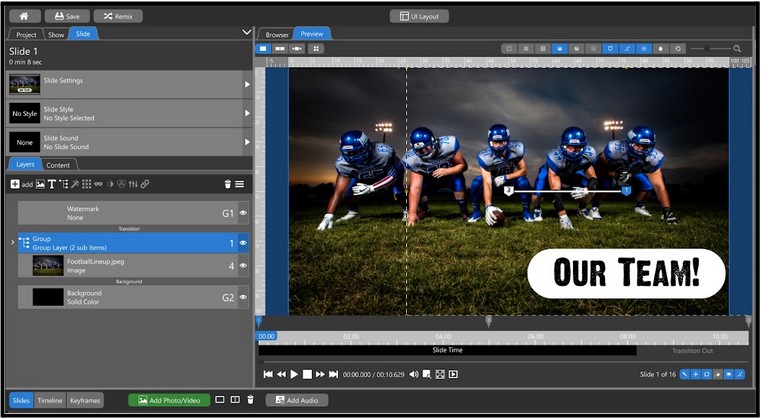
You can quickly animate the caption and shape together by adding both layers into a Group and then animate the Group.
Shapes as a Mask
When a Shape is applied to a layer, it becomes part of that layer. As a result, the shape and the layer cannot be animated separately.

To animate an image separate from a shape, use the shape as a masking layer over your image.
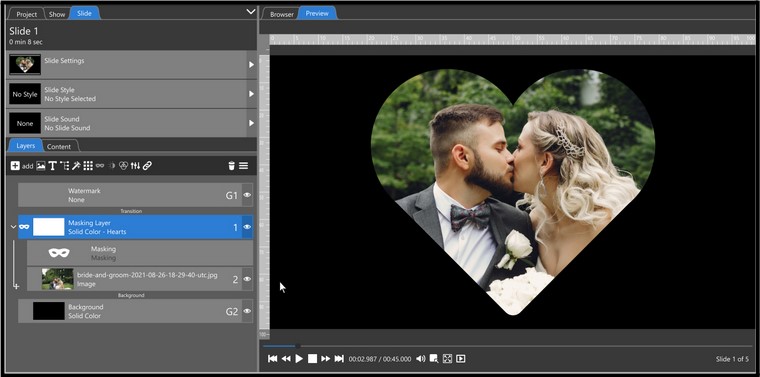
This will look like the shape was applied to the image but still allow separate animation, such as panning or zooming the image behind the mask. This technique allows you to apply unique and visually appealing effects to your images.
Shapes as Transitions
Director users can use Shapes to create unique transitions.
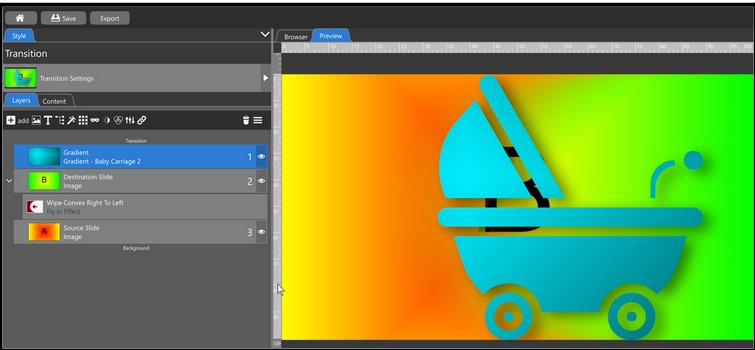
A solid or gradient layer with a shape applied can be used to transition from the Source Slide to the Destination Slide for easy and fun transitions. Simply animate the shape layer across the screen while removing the Source Slide or adding the Destination slide. Examples of this transition could be Snowflakes falling or a baby carriage crossing the screen.
Shapes Add Background Interest
Some of the new Abstract Shapes would be great to use as added interest in the background of your slides.
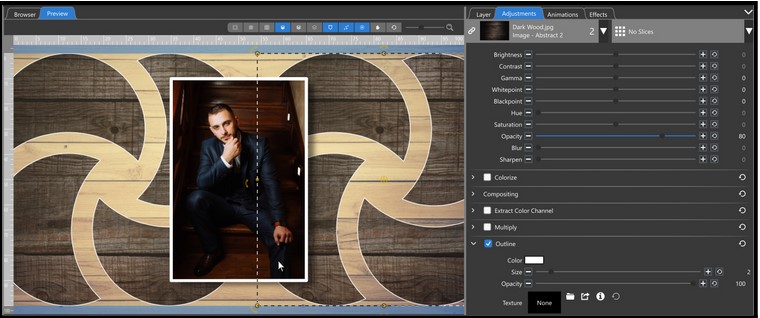
In the example above, the Abstract 2 shape was applied to two separate layers of a Dark Wood image. These layers were positioned on opposite sides of the screen above a light wood background. To achieve the desired effect, the opacity of those layers was reduced to 80%, and a small white outline was added for additional detailing.
Using Shapes can be a fun and creative way to add interest to your slideshows. Take some time to explore all the different ways that you can use shapes to enhance your shows!
