The Photopia Blog
Tips, tutorials & inspiration for making slideshows
February 6, By Photopia
Understanding Volume Points
Photopia determines the level of your soundtrack and the timing of any level changes using Volume Points. Some volume points can be adjusted manually, others can not. Learn more about the different types of Volume Points in today’s blog.
Where to find Volume Points
Let’s start by locating and enabling Soundtrack Volume Points.

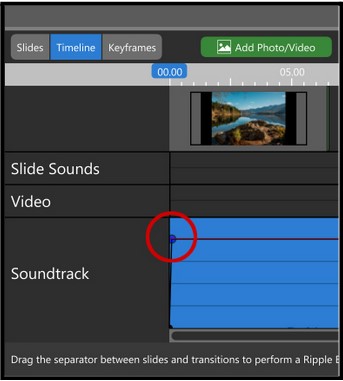
Volume Points are found in the Timeline View (above left). The Volume Points icon must be enabled in the Soundtrack Editing Toolbar on the far right side (above right). If an icon is light blue that means it is enabled; grey means it is disabled. To see the Volume Points easily, temporarily disable all other Soundtrack Editing Icons.
Dark Blue Volume Points
When adding a song to your Soundtrack for the first time, you will see only two dark blue Volume Points – one at the beginning and one at the end of the soundtrack.
These dark blue Volume Points are related to the soundtrack’s Fade In and Fade Out settings. To view those settings, select the Show tab in the Navigation Panel, then select the Song in the Soundtrack list. The Soundtrack tab will be shown in the Options Panel on the right side of the screen. The Fade In and Fade Out default durations are set at 0.1 seconds, which is no fade at all.

If the Fade In is changed to a larger number, say 2.0 (shown above), you will see the dark blue volume point move in 2.0 seconds. These dark blue volume points can be manually moved forward or backward to adjust the length of the fade. Dark Blue Volume Points cannot be moved up or down which would alter the entire Soundtrack Volume level. The entire soundtrack volume can be adjusted by using the slider bar in the Track Settings window or manually raising or lowering the volume using the Volume Tool icon.
Black and Light Blue Volume Points – Slide Sounds
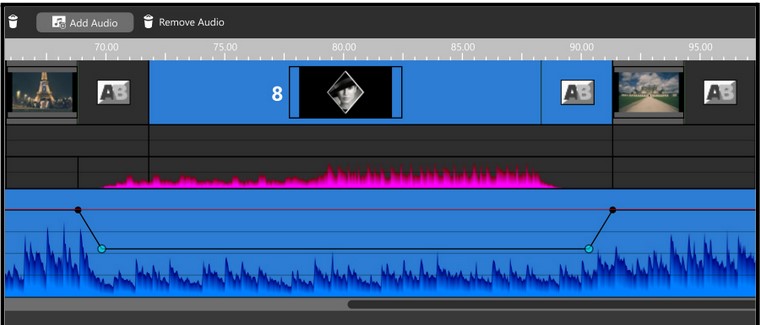
If a slide has a sound file attached, like a video with sound or added narration, black and light blue volume points will appear. The black volume points are fixed to the master volume and cannot be adjusted. The light blue volume points can be individually moved left or right to adjust the fade time. They can also be moved up and down to adjust the volume level, but they will always move in unison to maintain consistency in the volume level. To remove volume points for slide sounds, drag one of the volume points to the top of the Soundtrack channel.
Yellow Volume Points – Custom
You also have the option to add manual volume points. Double-click anywhere in the Soundtrack to create a manual volume point. These points will appear in yellow.
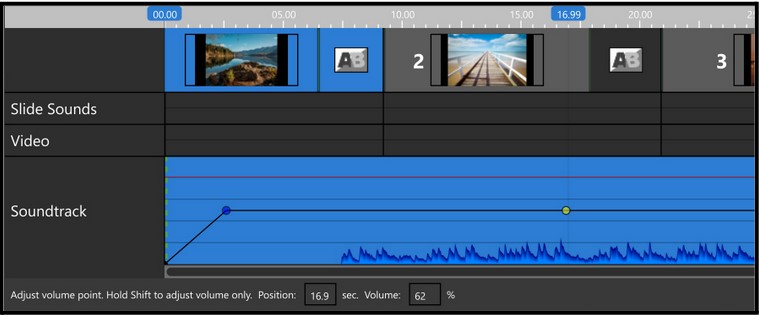
When there is only one manual volume point, moving it up or down will adjust the Master soundtrack between the closest two volume points, including black Volume Points. The volume point Position and Volume are shown in the number boxes below.
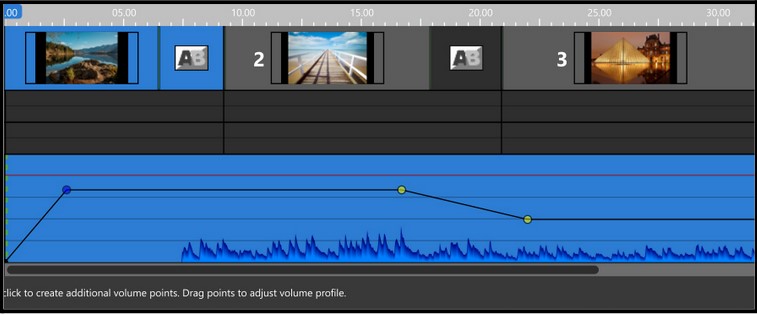
Adding a second manual volume point allows you to raise or lower the volume between the manual volume points, and then continue at that level to the next volume point.
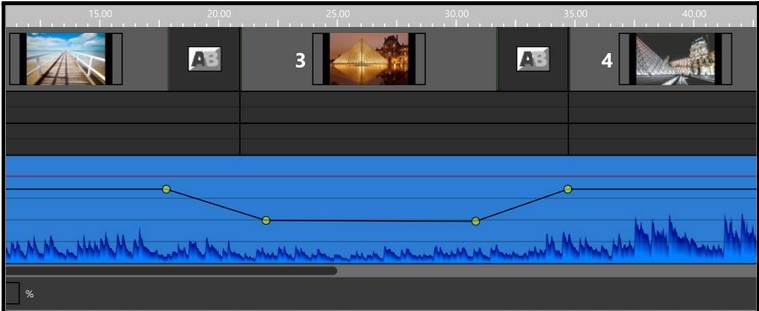
To create a change in volume, and then return to the original volume level, requires four volume points.
- Starting Level
- Desired Level (either up or down)
- Holding the desired level
- Return to the Starting level
To remove a volume point, right-click on Windows or Ctrl-click on a Mac.
