The Photopia Blog
Tips, tutorials & inspiration for making slideshows
NOVEMBER 28, By Photopia
Crossfading Soundtracks in the Timeline View
Editing your Soundtrack using its waveform is a great way to gain more precision to your audio editing. The Timeline view provides all the tools you need to visually edit your soundtracks using their waveform.
Learn more about fading Soundtracks in the Timeline view in today’s blog.
The Timeline view has a larger area for the Soundtrack Waveform than the Slides view. This allows for easier Soundtrack editing. In this view, using the mouse wheel will zoom the timeline in even further.
Photopia builds your slide show from left to right. This includes the soundtracks. For this reason, it is recommended to set the timing of the first song in the track first, then continue editing songs in the Soundtrack as they appear on the right.
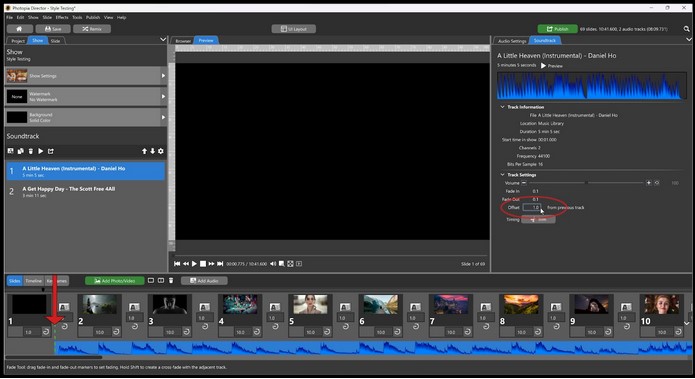
For example, if you don’t want the first song to start playing right away, select the soundtrack in the Navigation Panel (left), then in the Soundtrack tab in the Options Panel (Right) add a positive number to the Offset to move it to the right. Once you have this first song in place, all soundtrack editing should occur after it (to its right).

In the Timeline view, scroll to the point where the two songs meet (you must have enough slides already in place to match or exceed the Soundtrack times). The first song will be in blue and the next song will be in green. Each song added will alternate blue and green.
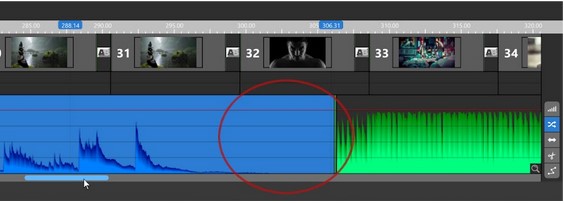
In our example there is a space of silence at the end of the first song, before the second song starts. We want to move our second song back, and create a nice crossfade between the two songs.

First, enable the Position tool ONLY. Disabling all other tools removes the possibility of accidentally trimming the song, changing the overall volume, or adding volume points.

Click on the second song (in green) to select it. Next, hold down the Ctrl key as you click and drag the second song to the left. The section of time that the two soundtracks overlap will turn to a light blue/green color.

Once you have the songs overlapped, enable ONLY the Fade tool. The Fade tool and Trim tool both affect the ends of a soundtrack. It is recommended to have these tools enabled individually, rather than at the same time, to ensure the desired action is taken.

Select the song you’d like to fade first. It will be highlighted in light blue, along with the waveform color. Next, hover your mouse over the end of that song until a double blue arrow appears (shown above).
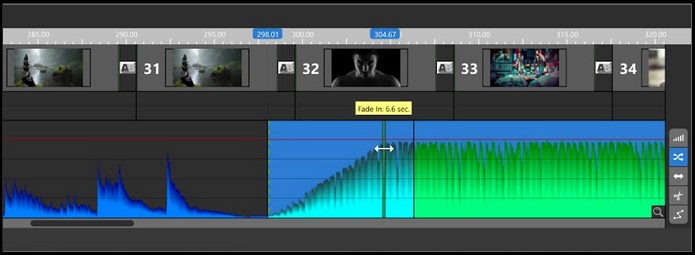
Click and drag the bar toward the song that was selected to create a fade. In our example, we selected the second song (green), so we dragged the bar to the right to create the fade. The height of the waveform reflects its volume.
To playback this section of the timeline, click on the light gray time marker at the top, then hit the Spacebar.

If you’d like to adjust the position of the second soundtrack again, enable the Position Tool again, then use the Ctrl + Click and Drag method, or change the numerical Offset number in the Track Settings, directly above the timeline.
Repeat those steps with the other soundtrack, if necessary, to create a cross fade of one song into the next. Some songs start or end with a section of silence, as in our example, so crossfading both tracks may not always be necessary.


