Tips, tutorials & inspiration for making slideshows
May 9, By Photopia
Creating Scrolling Captions - Keyframes
Creating your own scrolling captions is a simple animation that can be done using one of two methods: using Keyframes or the Full Pan Up Behavior Effect. In today’s blog you’ll learn how to create this effect using Keyframes.
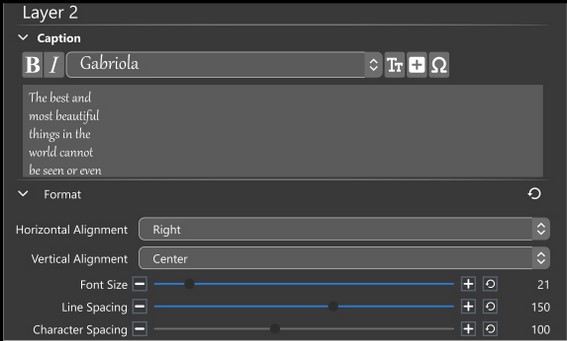
Start by setting up your Caption layer. In our example, we are using a quote by Helen Keller, with a Right Horizontal Alignment that will slide up the screen next to an image. The line spacing was increased to 150 to create more space in between each line. This extra space between the lines will help your audience, as it can be difficult to read moving text.
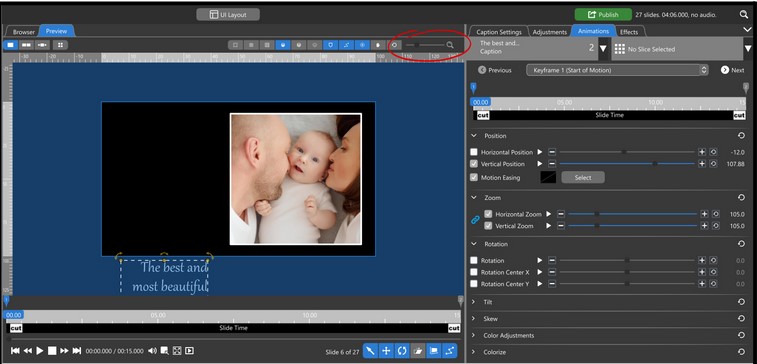
With the Animations Tab selected, use the Zoom Slider at the top of the Preview Window to zoom the canvas out. Select the 1st Keyframe of your Caption Layer and move it down to the bottom, below the visible preview area.
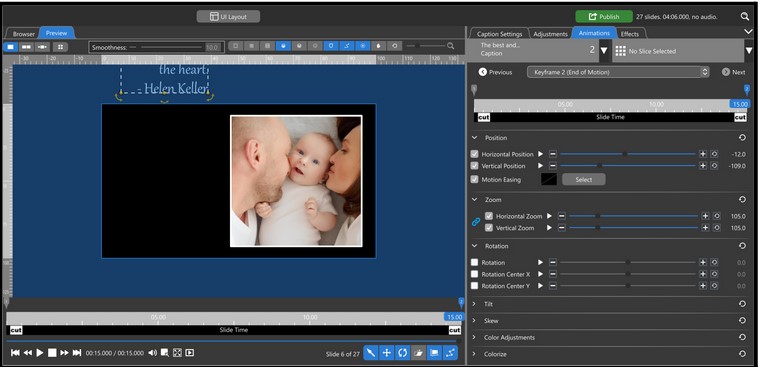
Select the 2nd Keyframe and move the Caption Layer to the top of the screen, above the visible preview area. To ensure the Caption moves straight up, the Horizontal Position should be the same for both keyframes. Hold your Shift Key while dragging your Caption Layer up, constraining the Horizontal position. Only the Vertical position number should change. The speed at which your Caption moves from the bottom of the screen to the top is related to both your slide time and keyframe positions. If the keyframes are at the furthest ends of the timeline and the motion is too fast, increasing the slide time will slow the animation down.
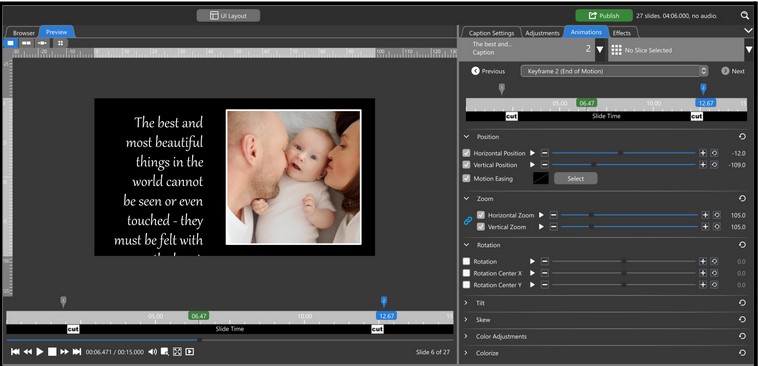
To create a pause before the Caption comes on screen, move the 1st keyframe to the right, toward the center of the timeline. To create a longer pause after it leaves the screen at the end, move the 2nd keyframe to the left, toward the center of the timeline.
We use cookies to ensure that we give you the best experience on our website. If you continue to use this site we will assume that you agree with this.OkNoPrivacy policy