The Photopia Blog
Tips, tutorials & inspiration for making slideshows
OCTOBER 25, By Photopia
Video Trimmer
The Video Trimmer window allows you to trim either the beginning or ending of any video file in a slide. This only trims the video inside Photopia; it will not affect the original file.

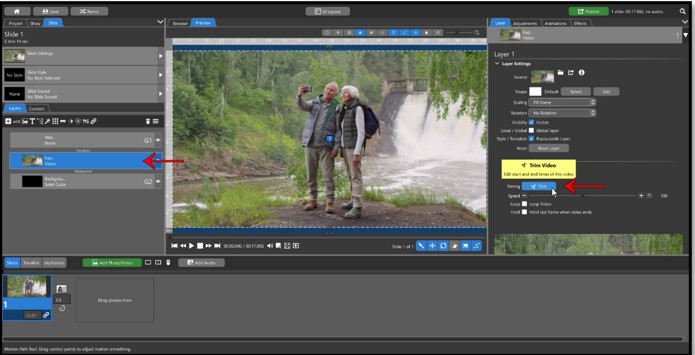
To open the Video Trimmer window, select the video file in the Layers tab for your slide. Then, in the Layer tab in the Options panel, click on the Trim button under the Video Clip Settings.

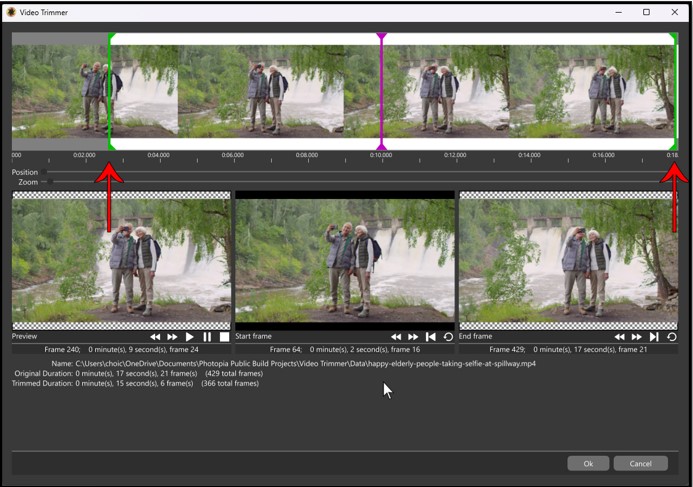
You will see two green handles on the right and left sides of the timeline at the top. These will trim the beginning and ending of your video file.

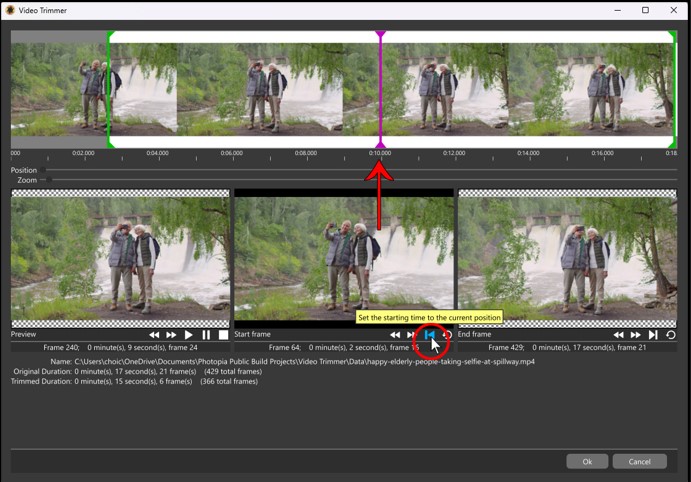
The pink handle in the timeline shows the frame location during playback. You can use this handle to find an exact trim point, then click on either the Start Frame or End Frame button to set the trim to that frame.

You can play your video file in the lower left window, which will always start playback where the pink marker is, not from the beginning trim point. Hitting the spacebar on your keyboard will also start and stop playback.

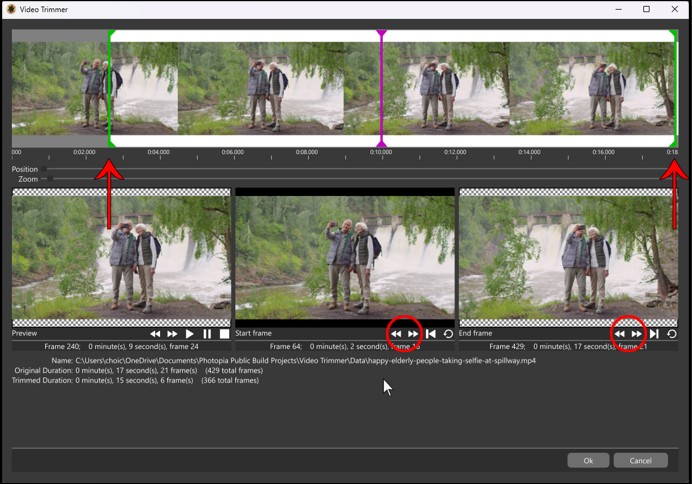
To fine tune your trim locations, use the step forward and step backward buttons for either the Start or End frame to move the green trim bars one frame at a time.

You’ll find information for the original video file duration as well as your new trimmed duration at the bottom of this window.
