Tips, tutorials & inspiration for making slideshows
SEPTEMBER 20, By Photopia
Training Tuesday: Slide Timing Mode
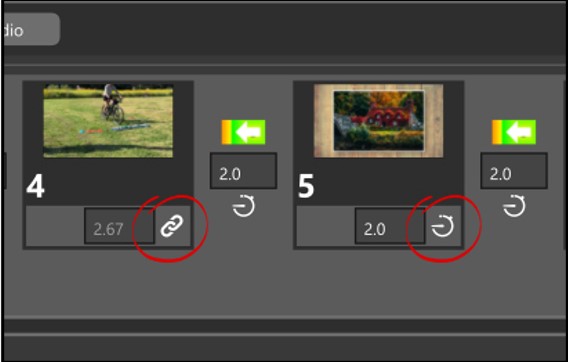
There are several options for how your slide time is set. In the bottom right corner of every slide you will see a Timing Mode icon.
The deafult for video files is to Lock the slide time to the length of the video file (shown above left). The default timing mode for still images is Manual(shown above right), which means you can change the slide time by manually entering a number.
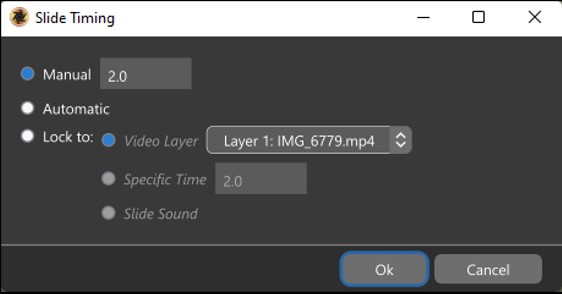
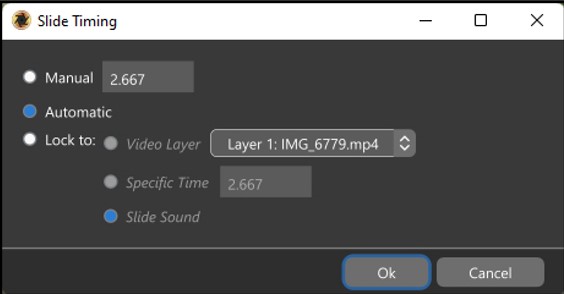
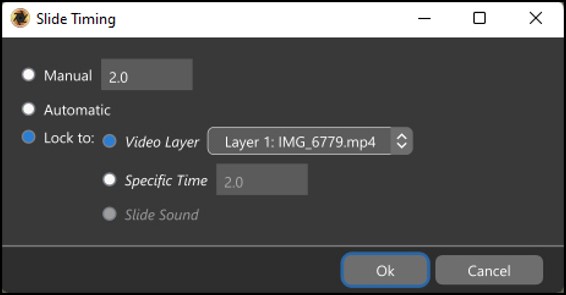
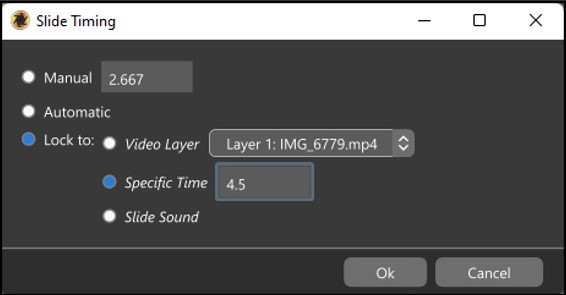
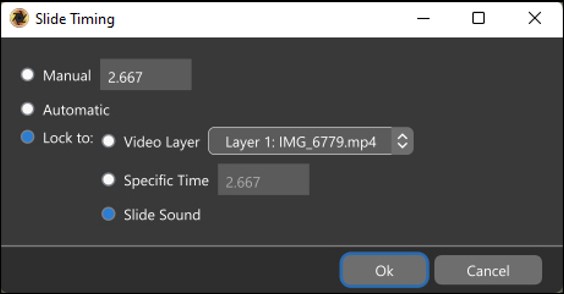
You can change the timing mode for any slide by clicking on the Timing Mode icon to open the Slide Timing window. There you have three options:
Manual – You will determine the slide time by entering a number into the number box
Automatic – The slide time is determined by Quick Sync.
Lock toaVideo Layer – This locks your slide time to the length of the video file in the slide, even when trimed. This time will include both the transition in and out.
Lock to a Specific Time – The slide time will be locked to a specific time that you enter into the number box.
Lock to a Slide Sound – The side time will be locked to the length of a slide sound that has been added to that slide.
There are similar icons for Transitions, but transition timing can only toggle between manual and automatic.
We use cookies to ensure that we give you the best experience on our website. If you continue to use this site we will assume that you agree with this.OkNoPrivacy policy