The Photopia Blog
Tips, tutorials & inspiration for making slideshows
MARCH 29, By Photopia
Training Tuesday - Photopia's User Interface
Photopia offers four different User Interfaces for you to work in. You can easily switch between the UIs while creating your shows. Click on the UI Layout button at the top of the Photopia screen to change the UI Layout.
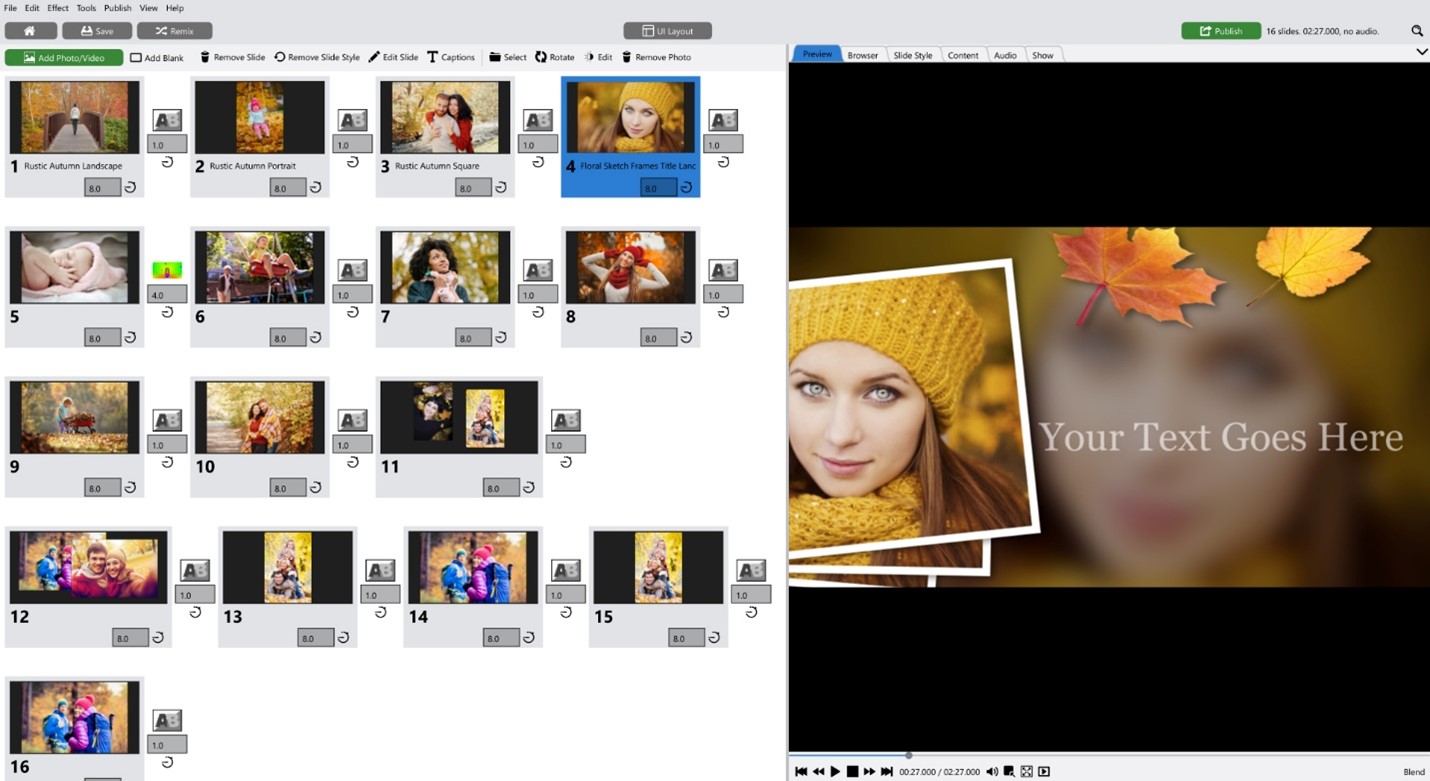
The Light User Interface
The Light Layout only has two panels: The Lightbox on the left and the Options Panel on the right. In this interface your slides appear in a Left to Right, Top to Bottom grouping, instead of in a linear timeline.
This User Interface gives you the least amount of customization options, which makes it the easiest interface to use if you only want to apply Slide Styles and Transitions, but not customize them. In this layout you can adjust your slide and transition times, re-arrange your slides, and add captions and music.
The Basic User Interface
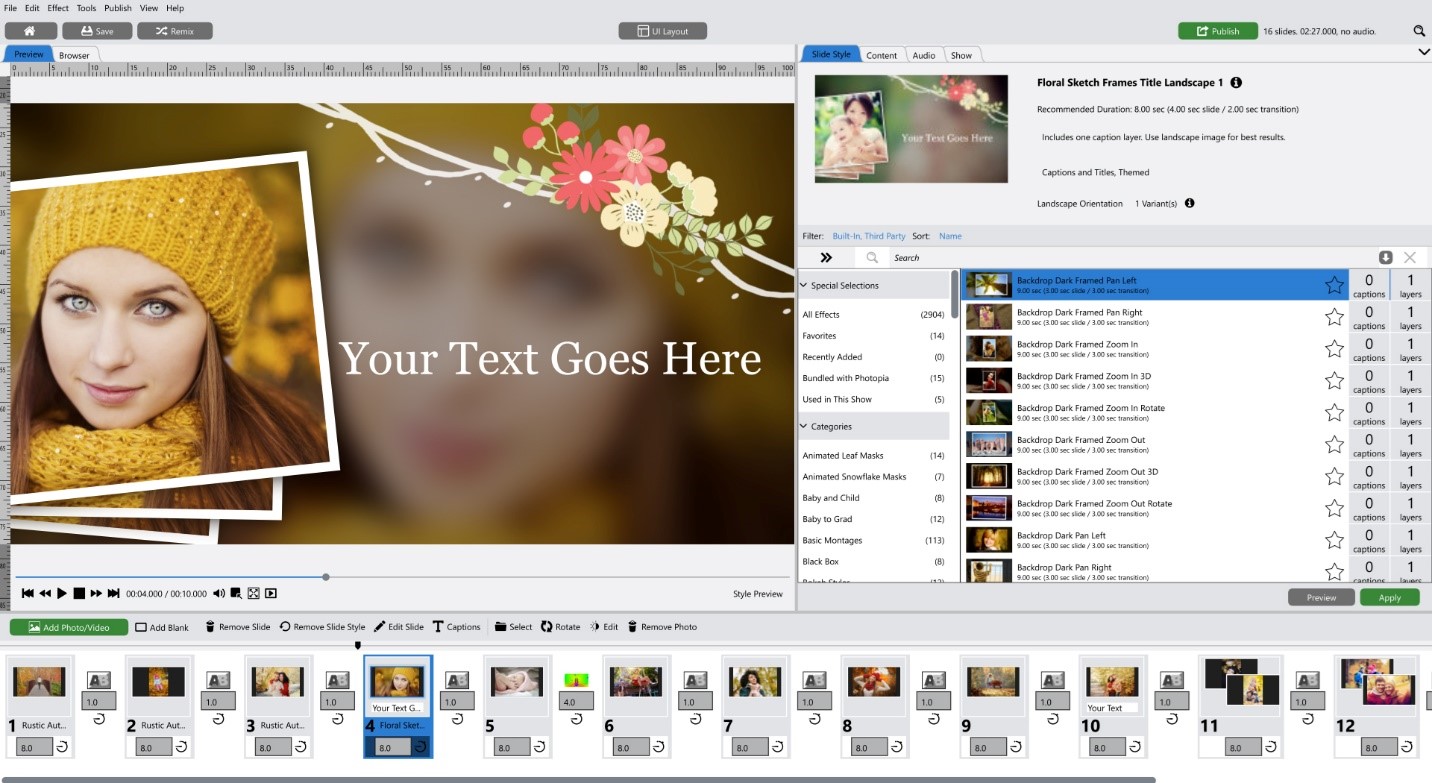
The Basic Layout displays your slides in a linear timeline at the bottom of the screen and separates the preview and browser windows from the Options Panel. Advanced customization options are missing from this layout, but you will be able to search through your Slide Styles, add audio and text without losing the preview window.
The Advanced User Interface
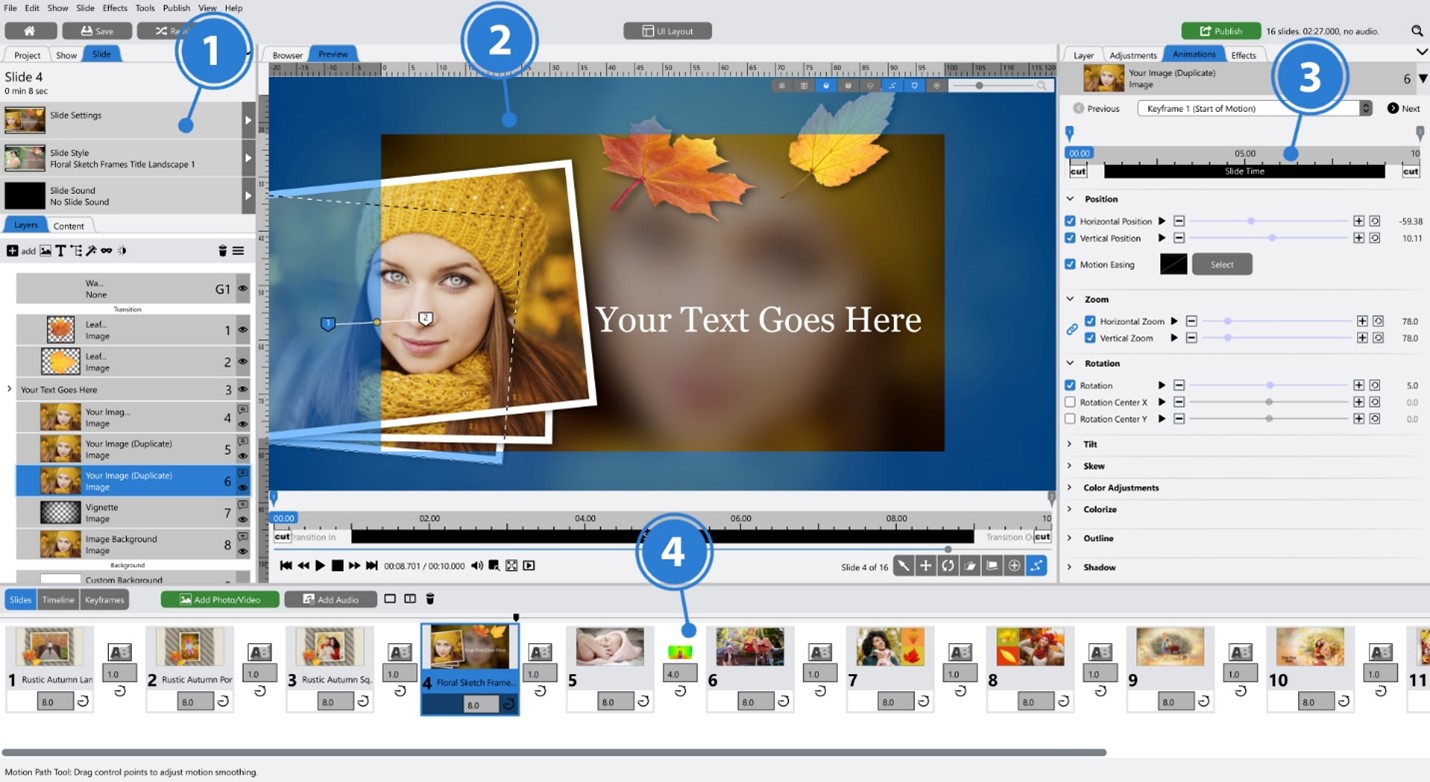
The Advanced User Interface gives you all the customization options possible in four panels. The Navigation Panel includes the Layers List, Slide Settings, Show Settings, and Soundtrack Settings, among others.
- The Navigation Panel includes the Layers List, Slide Settings, Show Settings, and Soundtrack Settings, among others.
- The Preview and Browser Panel toggles between your video preview window and the Browser where you can add more content to your show.
- The Options Panel, which works in sync with the Navigation panel, includes your Layer information, Adjustment options, the Animation Tab, and Effects Tab.
- The Slide List Panel at the bottom of the screen has three views to choose from: the Slides View shows your slides in a left to right linear fashion, the Timeline view shows your Slides in relation to your soundtrack in separate tracks and gives you Audio Tools for visually adjusting your soundtrack. The Keyframes view shows all keyframes for each layer in one view for editing keyframes across multiple layers.

