The Photopia Blog
Tips, tutorials & inspiration for making slideshows
NOVEMBER 26, By Photopia
How to Loop Playback of a Published Show
There are various events where you may want your show to play on a continuous loop, allowing your guests to mingle and stop by to view it at their convenience. Keep in mind that looping a stand-alone video file is not done within Photopia; instead, it must be set up after ou have published the show.
You can set up looping for a DVD in the Customize DVD menu. However, looping for stand-alone video files is controlled by the video player you’re using, not by Photopia or the video file itself. Most video players offer a loop option, which you must find within the player’s settings.
Below are examples of where to find the loop option in older and newer versions of Windows Media Player and Mac QuickTime Player. If you use a different video player, the loop option will likely be found in a similar location.
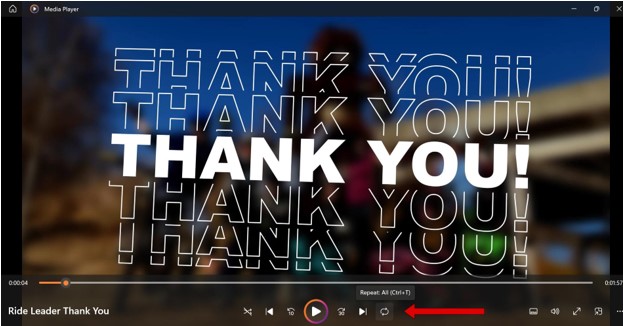
In the older version of Windows Media Player, the Loop (Repeat) option is the button on the far right side of the player controls:
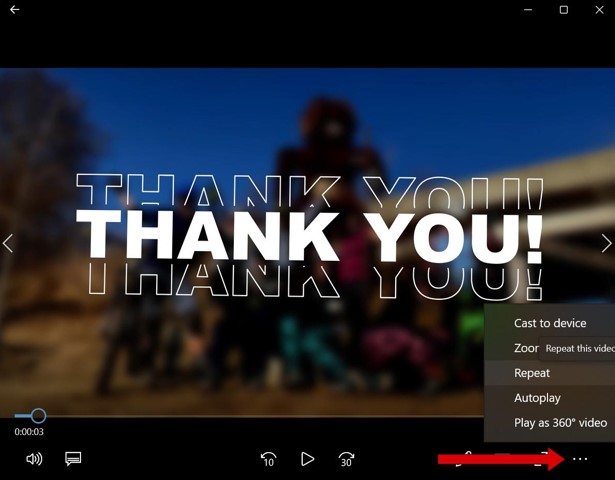
In the newer version of Windows Media Player, the loop (Repeat) option is in the flyout menu under the three dots in the lower right corner:
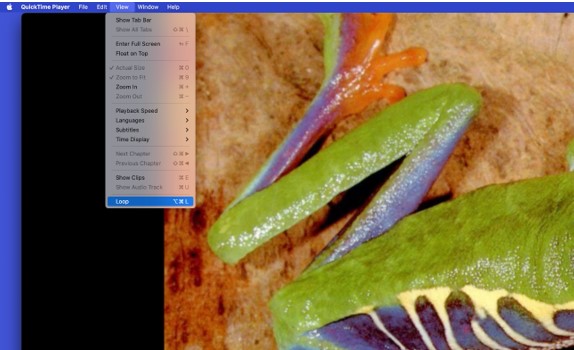
In the Quicktime Player, the loop option is under the View menu at the bottom of the list.
The DVD menu has a default loop option if you plan to publish a DVD directly out of Photopia. This menu option can be customized.
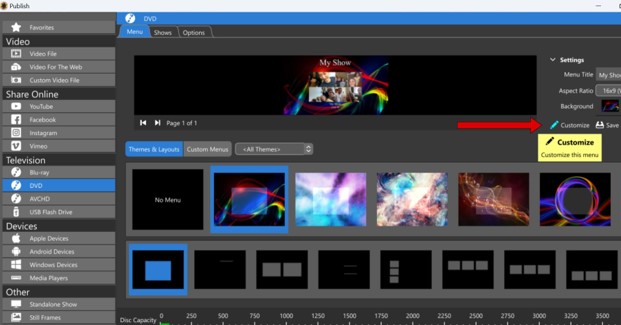
When publishing a DVD, click the Customize button.
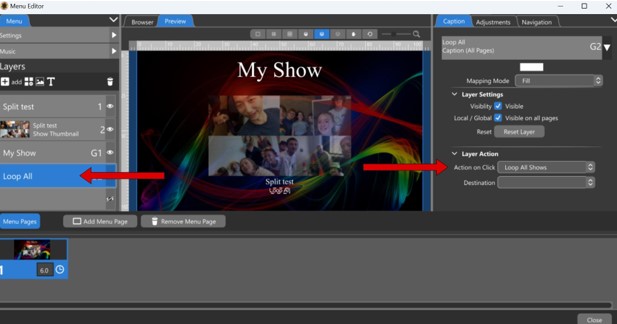
You’ll see a Loop All caption layer in the Layers list (left) with Loop All Shows selected as the Action on Click in the Caption tab (right). This option is available by default, but you can customize its font, size, and position in the DVD menu.


