The Photopia Blog
Tips, tutorials & inspiration for making slideshows
NOVEMBER 14, By Photopia
Video - Speed, Loop, and Hold
Adding video files to your slideshows is a great way to share moving memories. There may be times when the length of your video file is shorter than the slide and transition times. This can, unfortunately, cause unwanted results. Photopia provides a few options that can help extend your video file to fit your slide and transition times.
Learn more about Video Speed, Loop, and Hold in today’s blog.
Video Speed
Speed adjustments for video files are quick and simple in Photopia. Video speed is displayed in a percentage value where 100% is real time.

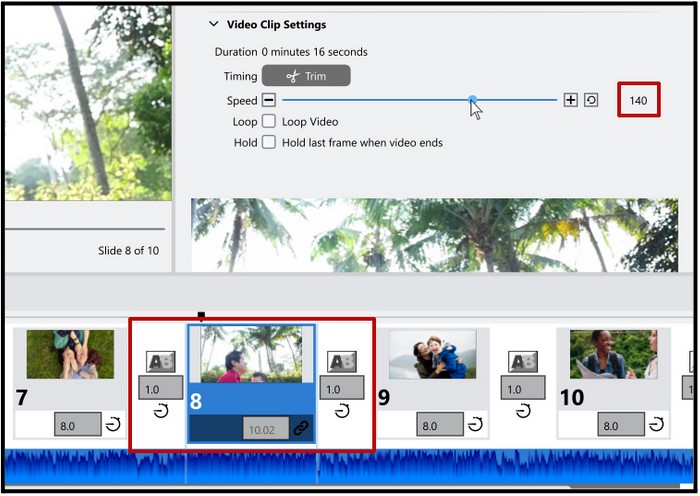
The video clip shown above is 16 seconds long when the speed is set to 100%, or playing back in real time. When the slide time is locked to the video length, and there are 1 second transitions on either side of the slide, the slide time becomes slightly more than 14 seconds.

Increasing the speed value above 100% will result in fast motion. This will shorten your video clip. In the example shown above, the speed is increased to 140%, shortening the 16 second duration down to 12 seconds in total time (10 seconds of slide time and 2 seconds for both the transitions in and out)

Decreasing this number below 100% will result in slow motion. This will lengthen your video clip. In the example shown above, the speed is decreased to 80%, lengthening the 16 second duration to 22 seconds of total time (19 seconds of slide time and 2 seconds for both the transitions in and out)
Note: Any audio that is attached to your video file will not play during playback if the speed is adjusted in either direction. However, the program will still recognize that there is an audio track embedded in the video file and will reduce the soundtrack according to the Soundtrack During Other Sounds settings.
Loop and Hold
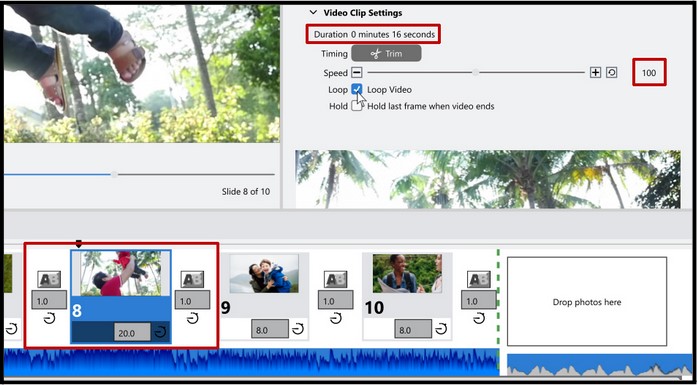
When a video clip isn’t as long as your slide and transition times, the video will disappear after its last frame. There are two options to extend a video clip without altering its speed.

In the example shown above, the video file is 16 seconds long with its speed set to 100%, or real time. However, the total slide and transition time is 22 seconds (1+20+1), which means the video layer will disappear before the slide ends.
The Loop and Hold options will prevent the video from disappearing after it reaches its last frame.

Loop
Checking the Loop option will make the video file loop back to the beginning after it gets to the end. This is best suited for Looped Video Backgrounds, where the last frame and the first frame are designed to be the same, so the audience doesn’t see a jump when the video loops back to the beginning.

Hold
This option will hold the last frame of the video file. This is the best option for non-looped video files. It will create a still frame from the last frame of the video file and hold it indefinitely through the end of the slide and transition times.


