The Photopia Blog
Tips, tutorials & inspiration for making slideshows
JUNE 13, By Photopia
Layering Images over a Video File
Layering images on top of video files can be a great way to incorporate longer videos into your shows, while adding extra interest during the extended video time. Your audience will see other images while hearing the audio from the video continuing to play underneath.
In today’s blog, you’ll learn how to layer images on top of a video file.
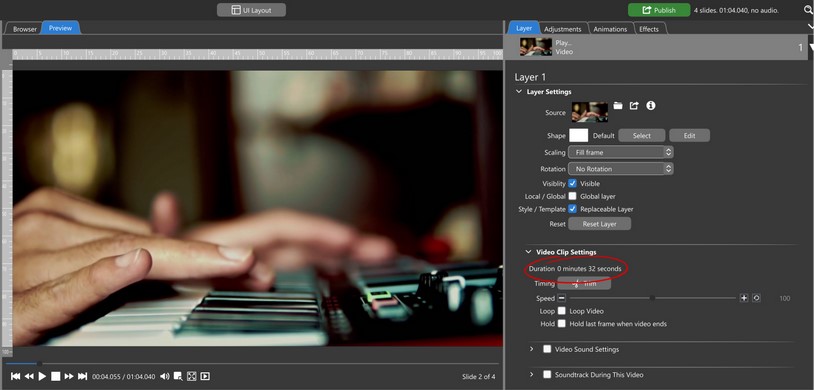
Start by adding your video file to a slide. In our example, we have a 32 second video of someone playing piano. We only want to see and hear the first 5 seconds of the video, then we want to see other images on screen while the audio from the video continues to play in the background.
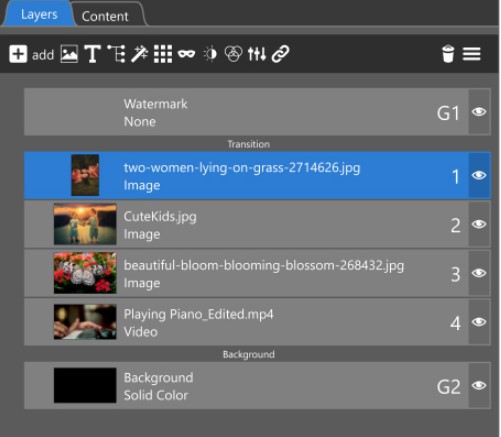
Add your images above your video in the layers list. The layers list is a stacking order, so the image at the bottom (Layer 3 – directly above the video file) will be the first one seen, and the image at the top of the list will be the last one seen.
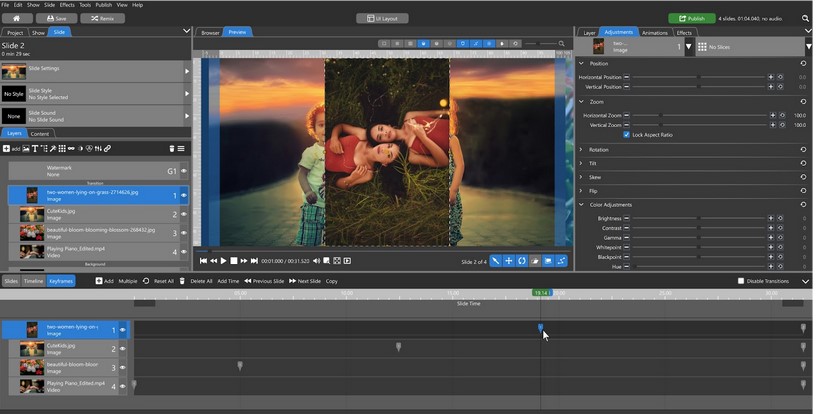
Select the Keyframes view. Move the 1st Keyframe of each layer to the right on the timeline (forward in time). Stagger them so that they are evenly spaced over the entire slide time. We want to see our video for the first 5 seconds, so we’ll place the 1st keyframe of the bottom most image (Layer 3) at the 5 second mark. We have two more images in our example, so we’ll play the video to determine when in the song we want each image to appear on screen. In our example, Layer 2 will appear at 12 seconds and Layer 1 will appear at 19 seconds.
After you have your keyframes set, preview your slide..
You should see each new image pop on screen, while still hearing the video underneath.
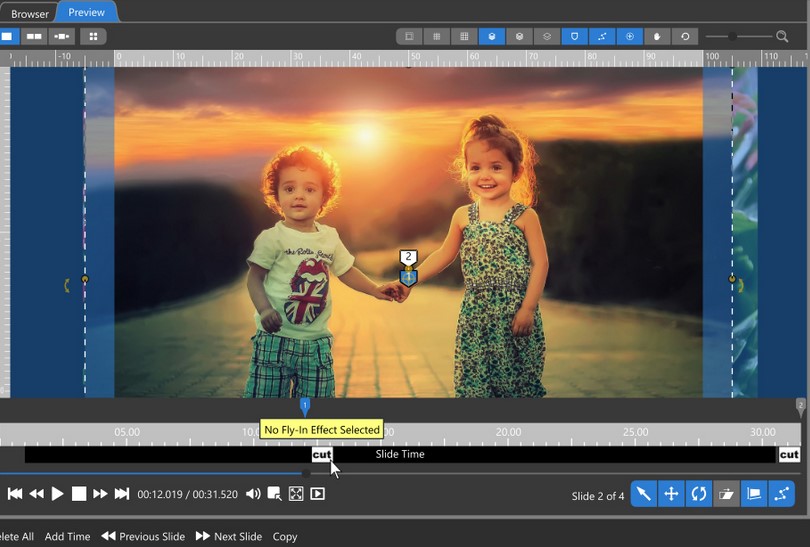
Adding a Blend Fly-In to the 1st Keyframe of each image layer will make the images come on screen smoother. To do this, click on the Cut icon under the 1st keyframe of each layer, then choose the Blend Fly-In.

The length of the Fly In can be adjusted by clicking and dragging its end line forward or back on the timeline.
Preview your slide to see the images fade on screen in succession over the video file.
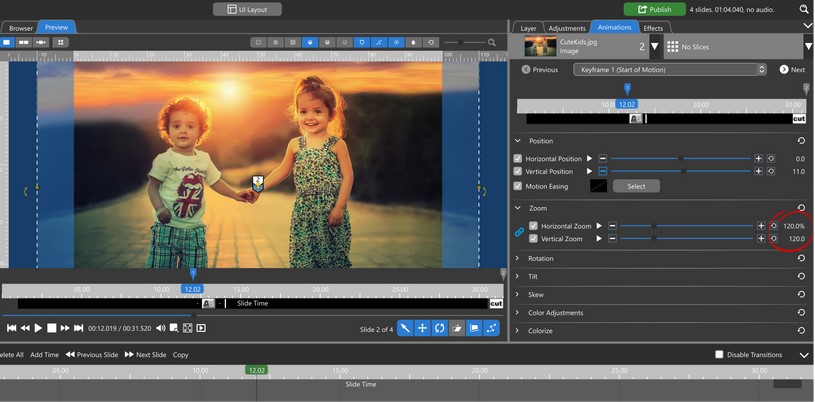
Adding a basic zoom animation to landscape images can create even more visual interest. To Zoom in, adjust the Zoom for the 2nd keyframe to 120% and reposition, if needed. To Zoom Out, adjust the Zoom for the 1st Keyframe to 120%. The opposite keyframe should remain at 100%.
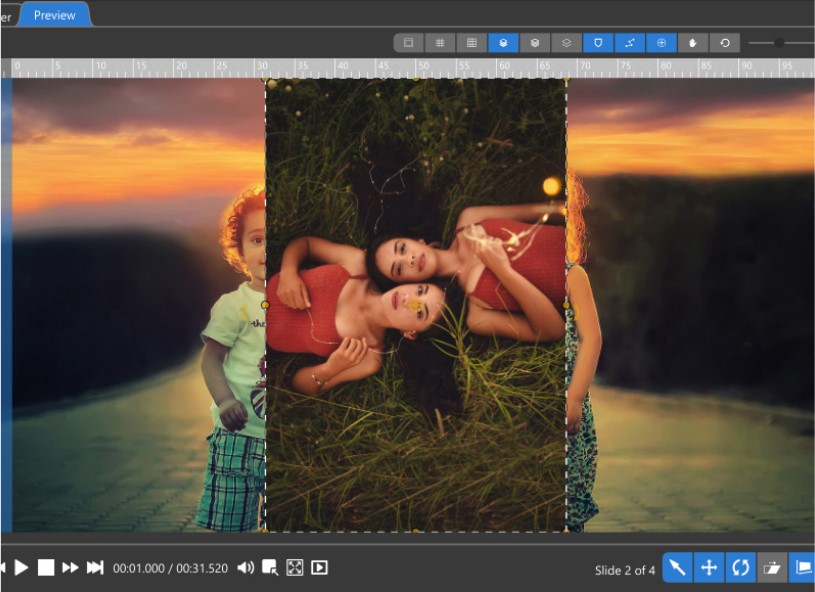
Portrait images may require some extra attention. When set to Fit to Frame, they don’t fill the screen and, therefore, won’t cover the layers underneath.
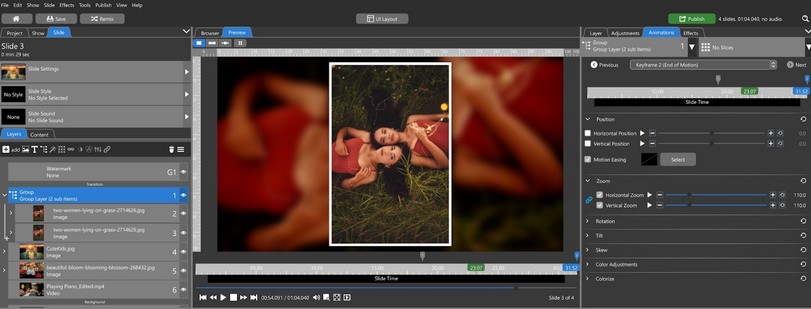
In our example, we took the following steps to create a full screen group from our portrait image:
- Duplicate the portrait image
- Set the bottom duplicate’s scaling to Fill Frame (the top should be Fit to Frame).
- Increase the blur for the bottom layer and decrease the Whitepoint and Blackpoint settings to -20.
- Add an outline and shadow to the top image
- Add both images into a Group
- Move the first keyframe of that group forward on the timeline until it reaches the time just before the images blend in, then zoom the group by 110% (since this is the last image, it has less time to zoom and 120% would have been too fast)

If you would like to see the video again at the end of the slide, bring all of the images’ 2nd keyframes back on the timeline (they must be placed after the next image has faded in, but before the last image fades out). Add a Blend Fly-Out to the final image. Our final image was the Portrait that we placed into a group. Groups cannot have Fly-In or Fly-Outs, so both the portrait images inside the group would need to have the Fly-ins added to them.
You can watch the final result below.


