The Photopia Blog
Tips, tutorials & inspiration for making slideshows
MAY 30, By Photopia
Creating a Text Reflection
Reflections can be a visually stunning effect for your slideshows. Creating them takes only a few simple steps and you will gain more experience with Adjustment Settings, Masking Layers, and Groups.
In this lesson, you’ll learn how to create a caption reflection. Creating image reflections use very similar steps.

Start by finding a font that will work well with this type of effect. Since reflections require a flat “ground” element to reflect from, choose a font that doesn’t have letters that go below the baseline. In our example, we used Bebas Neue.
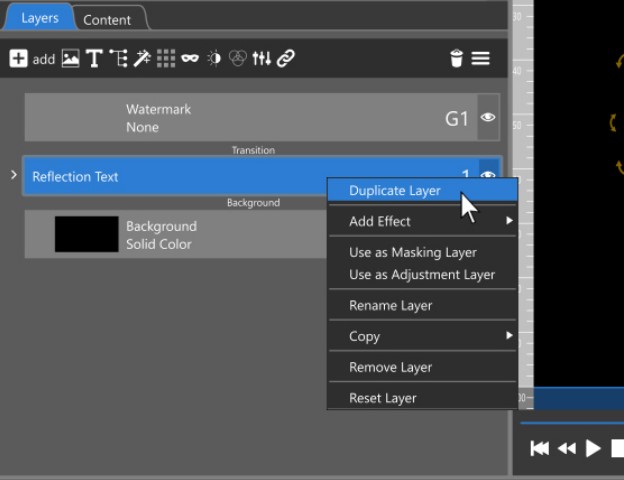
After creating your main caption, right click on it in the Layers List and choose Duplicate Layer.

Select Caption Layer 1 and go into the Caption Settings tab. Set the Vertical Alignment to Bottom.
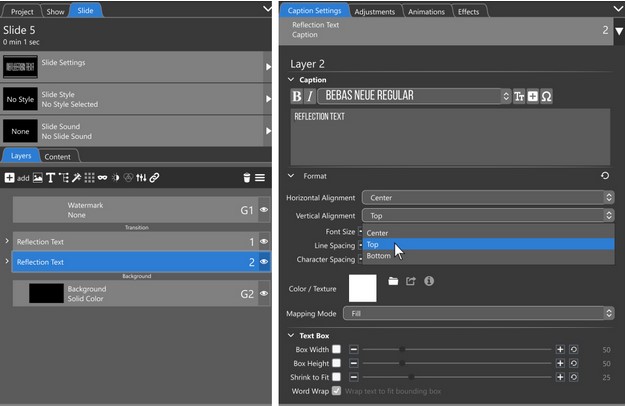
Select Caption Layer 2 and set the Vertical Alignment to Top.
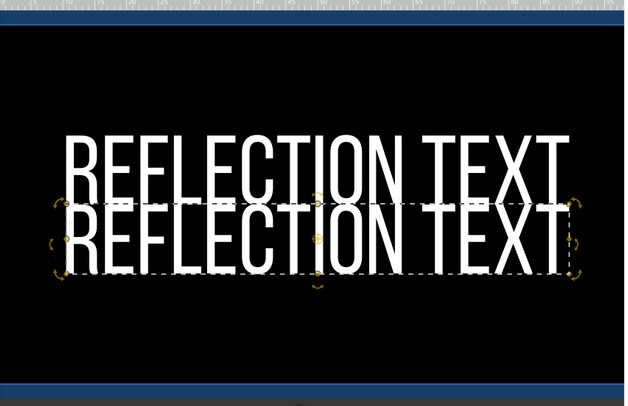
These settings will align the bottom edge of the 1st Caption Layer vertically with the center of the screen and align the top edge of the 2nd Caption Layer with the center of the screen. This gives the appearance that the text layers are directly on top of one another.
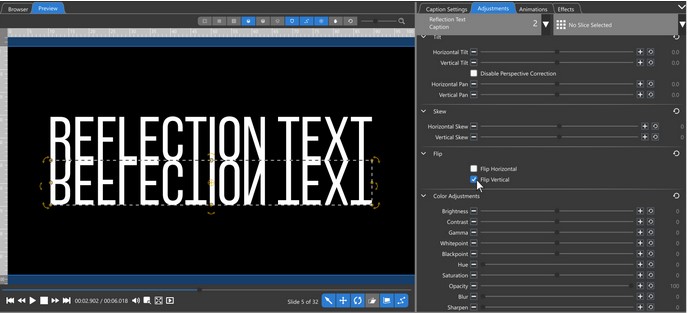
Select the 2nd Caption Layer and go into the Adjustments Tab. Check the Flip Vertical option under the Flip settings.
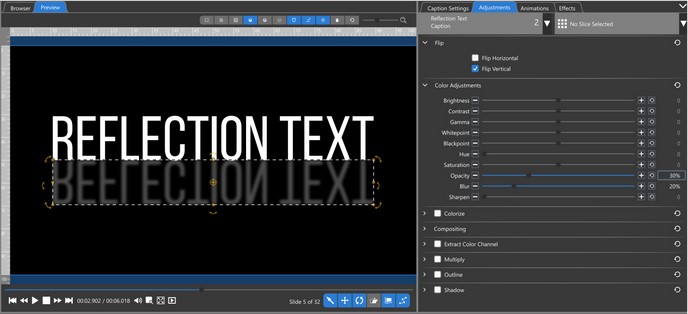
Open the Color Adjustment options and bring the Opacity down and the Blur up. We have used 30% for Opacity and 20% for Blur.
This creates a basic reflection. Some reflections fade out as they get further away from the reflected object. To create opacity that fades, we’ll use a Masking Layer.
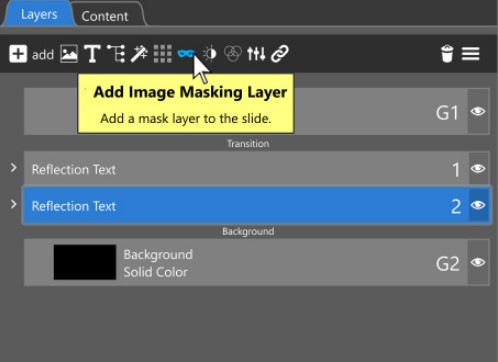
Select the bottom Caption Layer and click on the Mask icon at the top.
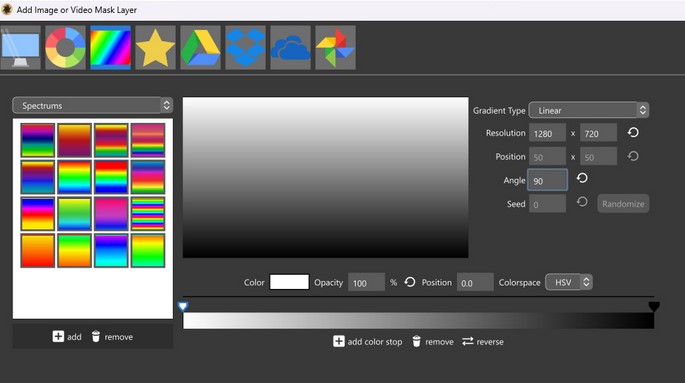
In the Add Image or Video Mask Layer window, use the Gradient icon at the top to choose a Gradient Layer for the mask.
Keep the colors as Black and White and the Gradient Type as Linear. Change the Angle to 90. If your gradient has the Black on top and White on the bottom, click on reverse at the bottom to swap them. Masking Layers use white to reveal what is underneath and black to conceal what is underneath. By having white on top and black on the bottom, the image under the mask will slowly fade in visibility from top to bottom.
With only two Color Keyframes at the far ends of the Gradient, this fade is too gradual. This Mask will be 100% visible at the very top and 100% invisible at the bottom, with a gradual fade in between. We want the fade to start (white color keyframe) at the bottom of our main caption layer and fade out (black color keyframe) before it gets to the bottom of the reflection text layer. To do this, we’ll shorten the distance between the white and black keyframes.
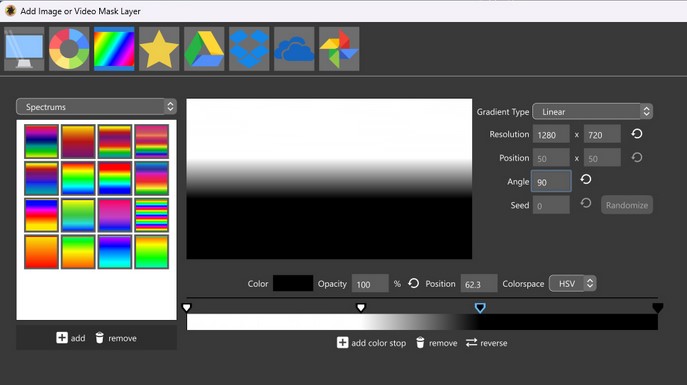
Bring both Color Keyframes in toward the center to create a shorter fade distance. Click ok to accept the Mask.
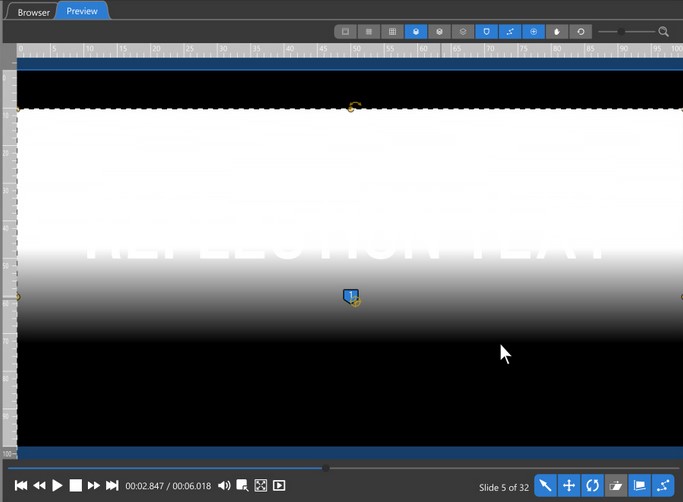
With the Masking Layer selected in the Layers List, position it lower so that the bottom edge of the solid white portion of the mask is at the bottom of the main text layer.
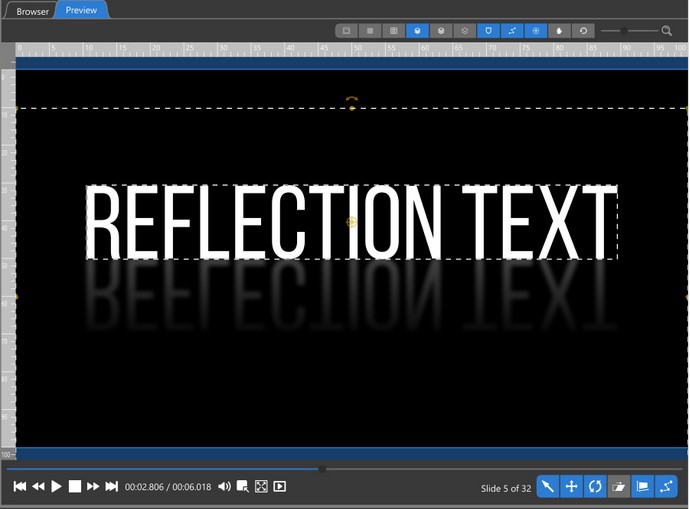
The result should be a slight fade in opacity from the top of the reflected text to the bottom. If the reflected layer doesn’t seem to fade toward the bottom, move the Gradient Color keyframes closer together. If the fade cuts off some of the reflected text, move the Gradient Color Keyframes further apart.
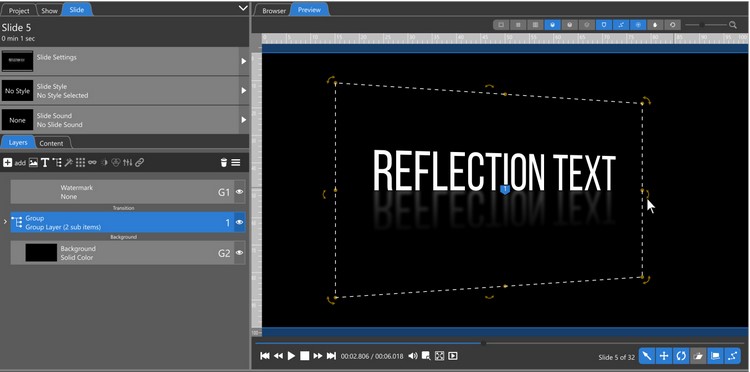
When you have your Main Text and Reflection set, you may want to reposition them. To adjust them as a single unit, put all layers inside a Group. You can then reposition, zoom, or tilt the Group.
Select Caption Layer 1 and go into the Caption Settings tab. Set the Vertical Alignment to Bottom.
