Tips, tutorials & inspiration for making slideshows
MARCH 28, By Photopia
New Photopia Update - Build 949
There are lots of exciting additions and updates to this new Photopia Build! Click here to view the entire list of updates.
The most notable update is the introduction of Effects Packages for Photopia Director users. An Effects Package is a collection of effects, compiled into a single file that can be exported and distributed to others.
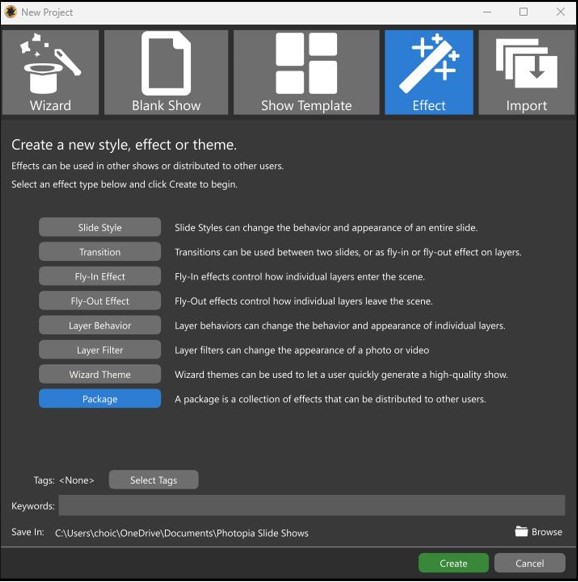
To create a new Effects Package, start in the New Project Window under the Effect heading.
Select Package at the bottom of the list. Click Create to start building the Package. In the next window, give your Package a Name, Description and any Author information, then click OK.
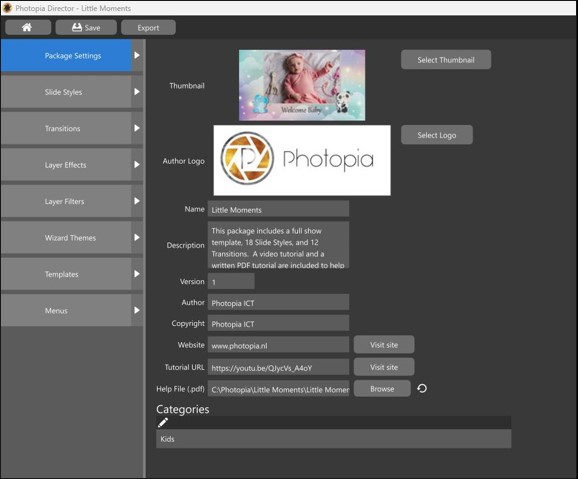
To create your package, start in the Package Settings tab in the upper left section of the window. This is where all of the informational details of the package can be customized, including:
Package Thumbnail
Author Logo
Package Name
Package Description
Version Number
Author Information
Video Tutorial Link
Attached Help File (.pdf)
The last item in this tab is to add your package to Categories.
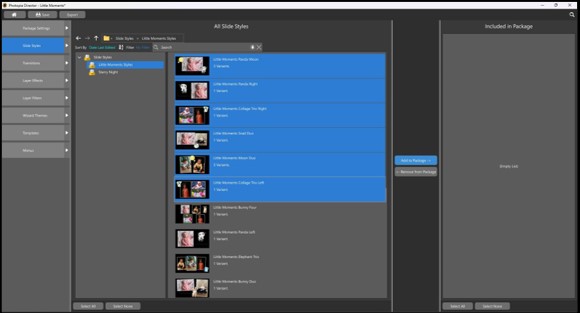
The subsequent tabs on the left are lists of effects that you have created, including Slide Styles, Transitions, Wizard Themes, Templates and more. Only effects that are part of your Projects can be added to Packages. Installed effects from 3rd parties cannot be added.
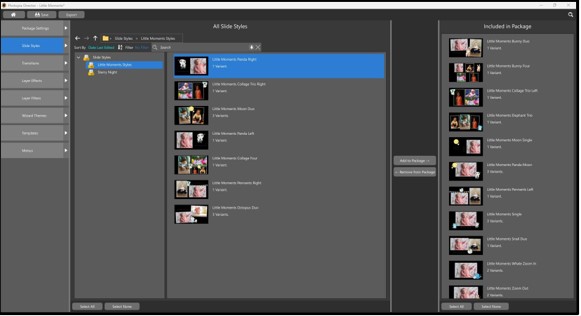
Each effect window has three columns. The column on the left shows your Project Groups. Once a Project Group is selected, the center column will display effects inside that project Group. To add effects to the Package, select the effects in the center column, then click on Add to Package.
The selected effects will now appear in the right column, which displays any effects that are included in the package. To remove any effects from the Package, select them in the right column, then click on Remove from Package.
When you are ready to export your Package, click on Export at the top of the screen.